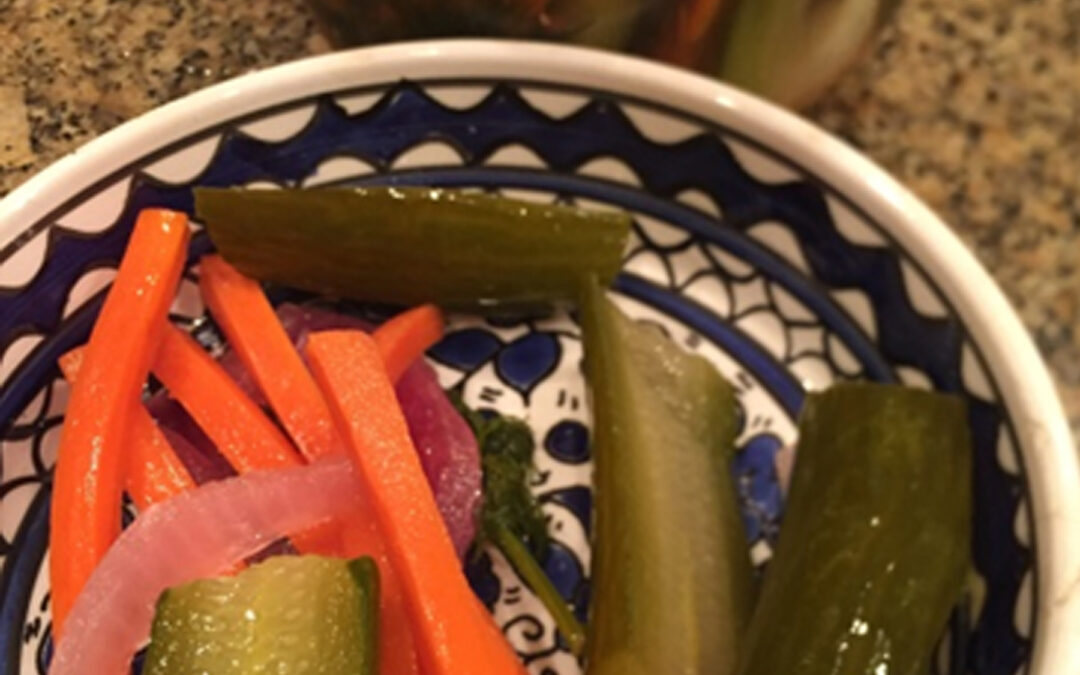
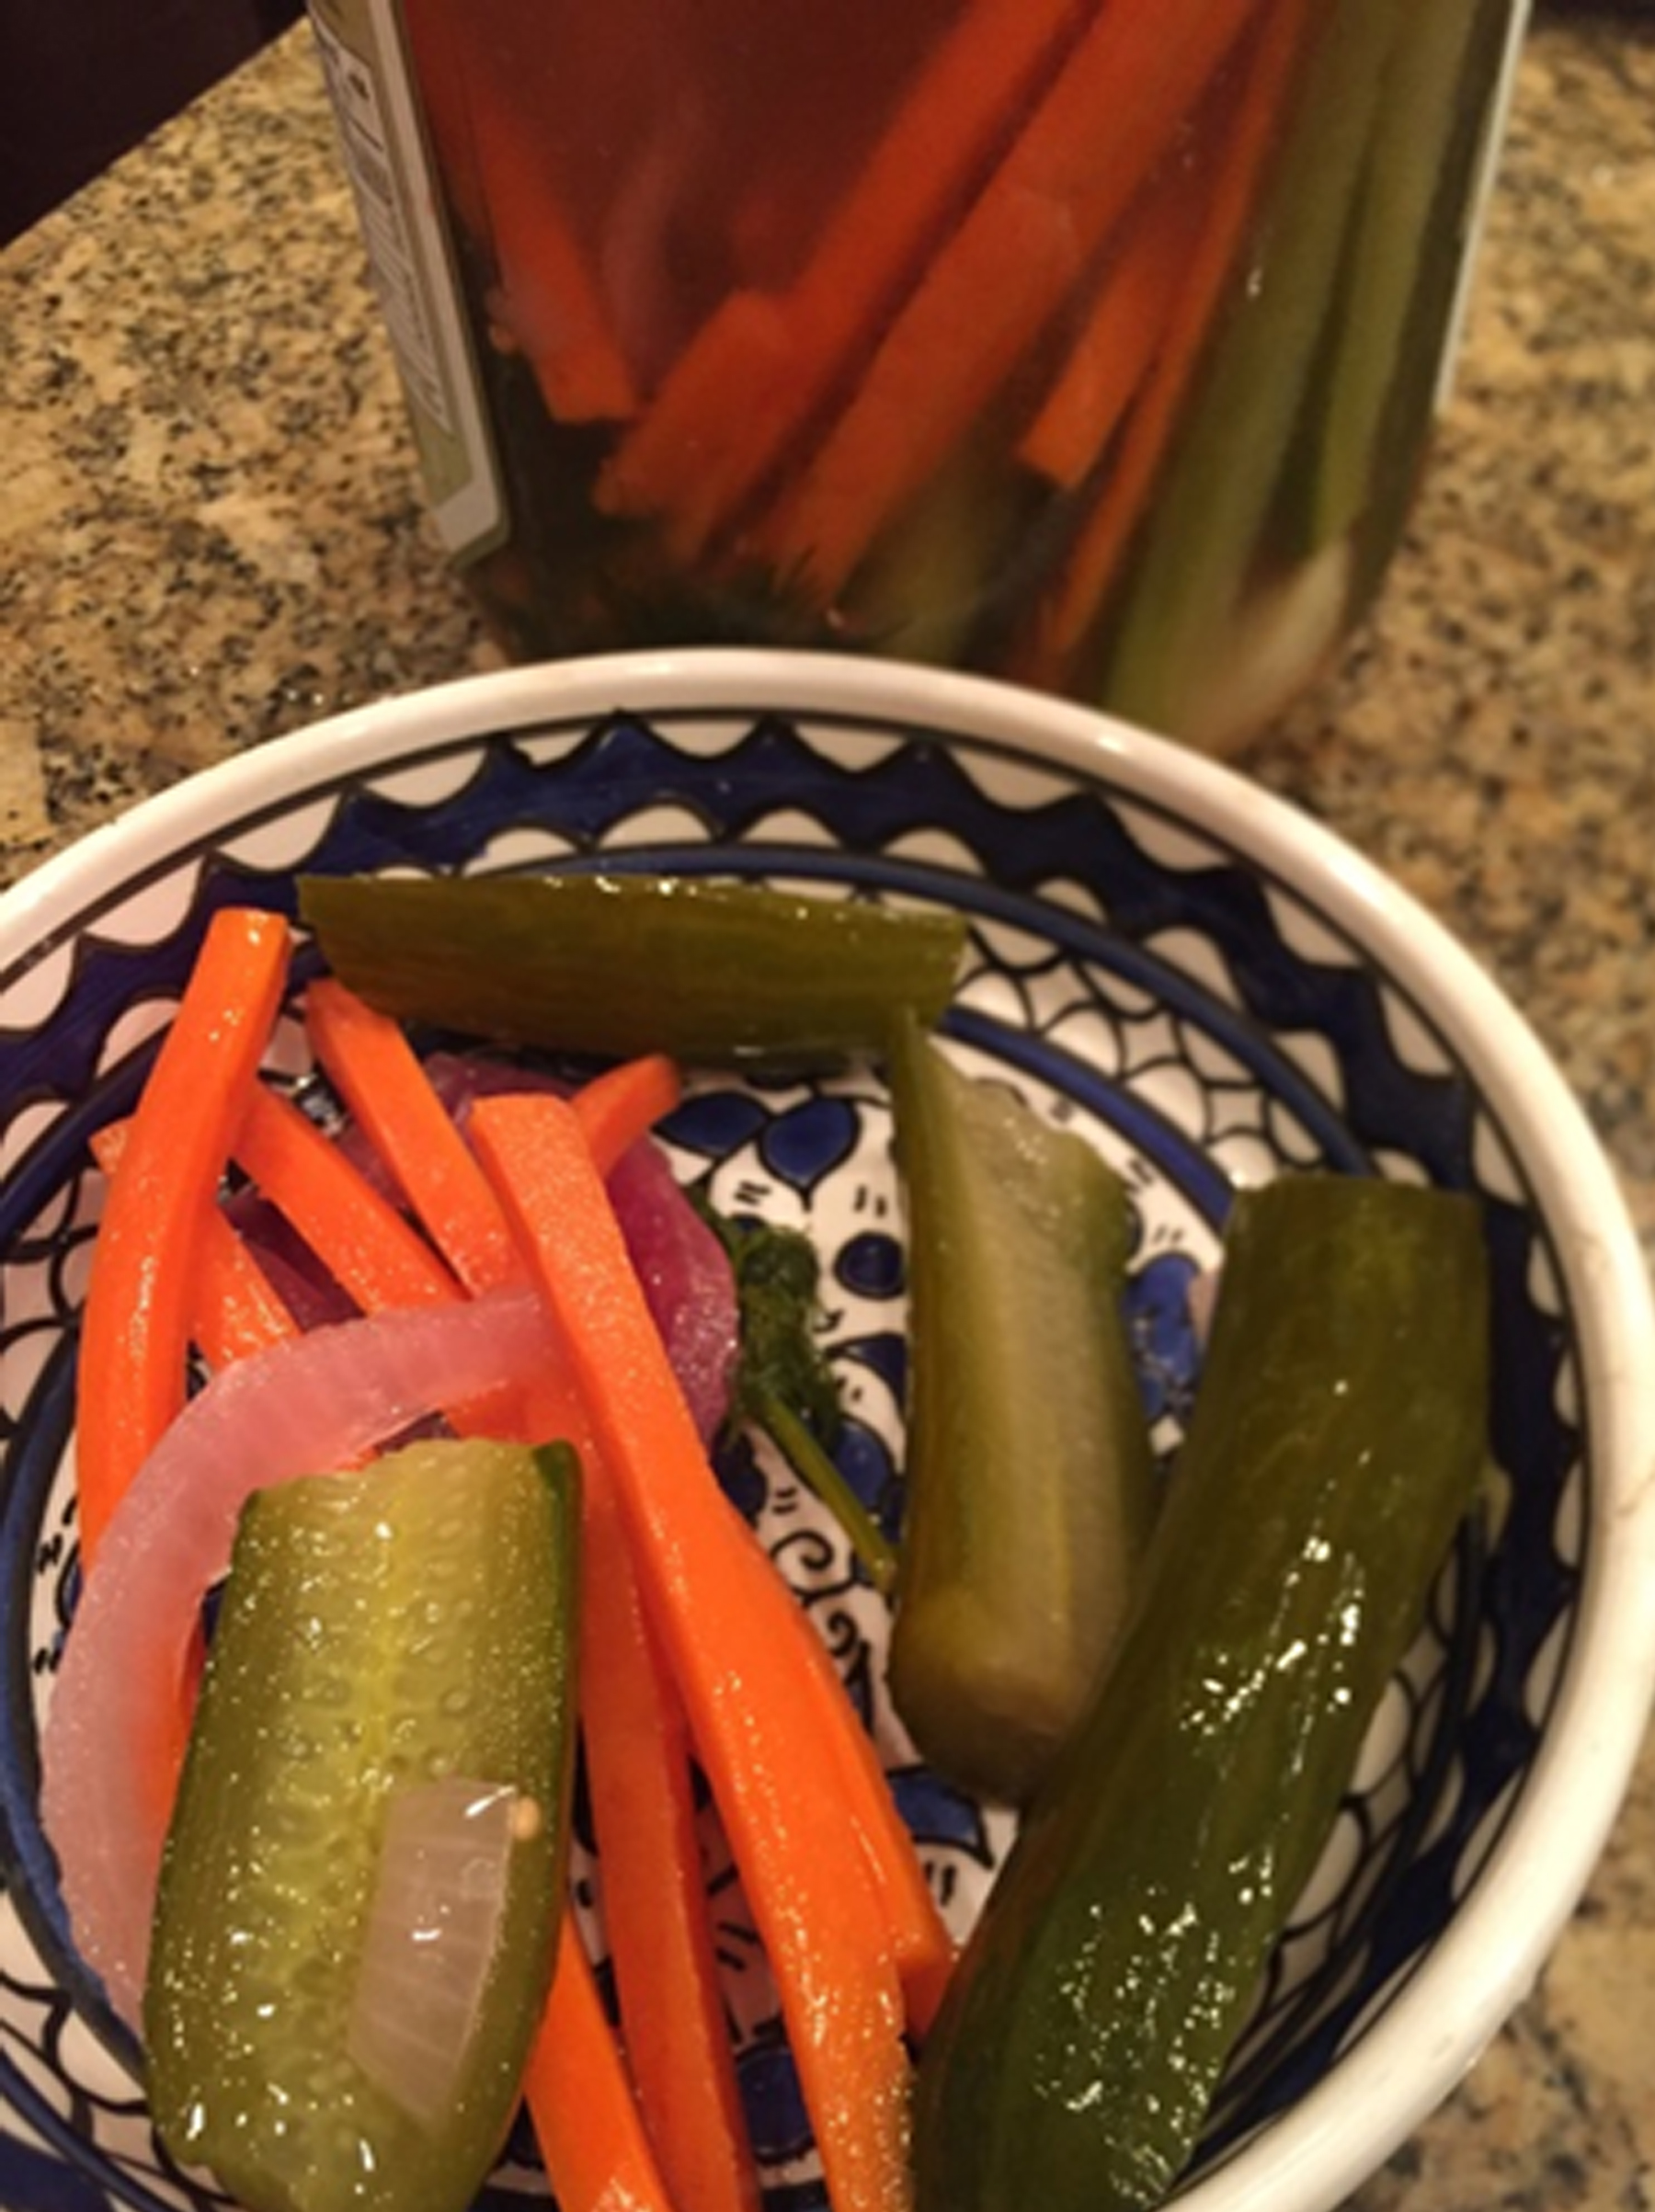
Have you entered the world of fermented vegetables yet? Do it once, conquer the learning curve, and then it will be easy. Dilly carrots are an appealing condiment that goes with just about any lunch or dinner. Aiming for one serving per day can improve digestion and boost your immunity.
Fermented foods are beneficial for promoting healthy gut-biome. Technically, lacto-fermentation is a process that uses natural food sugars and breaks them down into lactic acid, which aids healthy digestion. Lacto does not mean dairy! Fermenting breaks down the food fibers, preserves the food vitamins and promotes beneficial enzymes. The increased bio-availability means higher nutrition per bite of food.
Ingredients can vary according to what’s in your kitchen. For fermentation, organic vegetables are a good. These have natural lacto-bacilli that enhance fermentation. You can also use the lesser-sprayed vegetables that are conventionally grown from EWG’s Clean 15 list. Some good choices include asparagus, cabbage, and cauliflower. Ferments can include carrot, cucumber, radish, turnip. Always include some garlic cloves – it is a prebiotic which helps with the growth of beneficial enzymes.
Steps:
1. Wash mason jars. Make sure you have lids that can keep a tight seal for the end product. The lids can be purchased at some grocery stores and also home improvement stores. Unlike canning, the jars don’t have to be absolutely sterile, because you will be “harvesting” bacteria from your kitchen environment, for healthy benefits.
2. I use a lazy method to preparing my brine. Using a quart-size jar, I add several inches of hot water to the bottom of the jar, add 1 Tbsp. sea salt, mix it, and let it sit while I prepare the veggies.
3. You don’t need to peel your carrots. Soil also contains natural beneficial bacteria. Take a scrubbie or the blade of a knife and clean the carrot, no need for perfection!
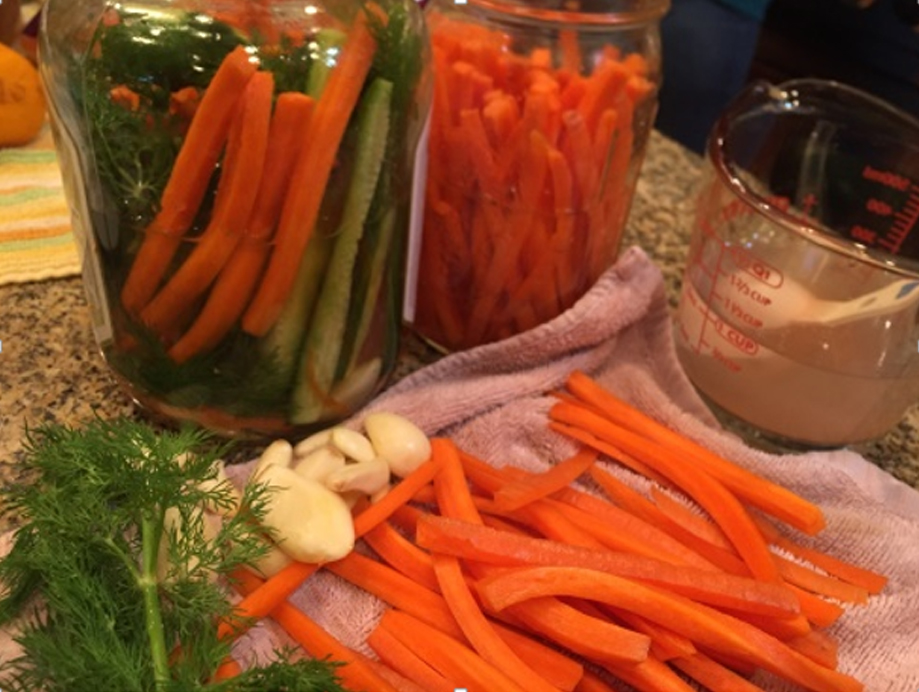
4. Cut carrot sticks that measure to 2” below the top of your jar.
5. Optional: cut slices of onion and 2-3 – 1” ginger slices leaving the skin intact. Add these to the bottom of the jar.
6. Add a handful of garlic cloves. Pre-peeled garlic is quick and easy. If you use a whole garlic bulb, the garlic skins also aid fermentation. Break the bulb apart and leave the skins on to remove later.
7. Add 2 Tbsp. pickling mix. Aim for a blend of black pepper, mustard seed, coriander, and bay leaf. Optional spices may include cinnamon stick, ginger slices, allspice, cloves, pepper flakes, fennel, caraway, and/or a hot pepper of your choosing.
8. Wash fresh dill. Place some in the bottom of the jar and layer the outside of the jar.
9. Pack carrots into the jar. Add non-chlorinated water up to 1” below the top of the jar.

Now you are ready to ferment! There are many fancy contraptions that help you establish a non-aerobic, slightly sealed environment for your veggies. The most important concept is that veggies must stay below the level of the brine, or they may mold. I have two methods.
Nested-jar method
Find a jar that nests into the top of your mason jar. Once you know it fits, fill it with water so it keeps the veggies down and still allows some amount of air exchange to the veggies.
Nested-jar and citrus method
On a whim, I cut a slice of navel orange and fitted it into the top of the jar. Then I added a nested jar to weigh down the veggies. It keeps a natural seal with allowance for air flow. It’s been very successful.
Put your set-up in a corner of the kitchen, with a towel over, and a towel or catch basin underneath. If the ferment leaks out, that’s OK. Check the pickles daily. When you like the taste, enjoy a few and put the rest in the fridge. They’ll keep for weeks.
TIPS: Vegetables have varying fermentation rates. Kitchen temperature affects the rate too. In my experience, asparagus take only 1-3 days. Cucumbers need to be checked so that you stop the fermentation according to your taste. Do you want half-sours, or full pickles? Test them every half-day. Carrots and onions can take 5-8 days, and garlic is best after 2-3 weeks. If you see a light scum at the top of the jar, it’s part of the fermentation, just scoop it out. If you get full-on mold, proceed with caution.
TRICKS: If you don’t polish off your garlic cloves, you can transfer them to a new batch of pickles. You can also re-use brine, once or twice. Brine can be a starter for the new batch – it will have natural kitchen probiotics to boost the process. Add a 1/2 cup to your new bring mix.
Be inspired to try your own combinations and enjoy!